When you create a new project, Iceberg lets you choose a template amongst a list of predefined project templates.
This document shows you how to create and add your own project templates.
| 1 | Open a new Finder window. |
| 2 | Choose Go > Go to Folder… . |
| 3 | Type /Library/Application Support/Iceberg/Projects Templates
in the Go to the folder text field and click Go. |
| 4 | Choose File > New Folder and set the name of the new folder to MyTemplates
to create a new category of templates.
|
Note: Of course, you can use a different name or just put your project template in one of the already existing categories.
|
|
|
| 5 | Within this folder, create a new folder and named it with the name that
shall appear in the list of templates in Iceberg. |
| 6 | Using a text editor or Property List Editor, create a file named template.packproj.
|
Note: It's obviously easier to duplicate a template.packproj file to use it as a basis for
your custom project template.
|
|
|
| 7 | Complete this file according to the Iceberg project format described in the
Document format document.
|
Note: MACROs can be used for some values in a project template so that they can be set when a project is created from a template.
|
|
|
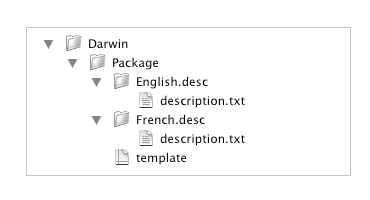
| 8 | Within the project template folder, create a folder for every localization you will
provide for the project description. The project description is displayed in the Project creation assistant window.
|
Important: These folders names shall conform to the following format: LanguageName.desc, where LanguageName
is the English name of the localization. Therefore the folder containing the English description shall be named English.desc, while
the French one shall be named French.desc, etc.
|
|
|
| 9 | Create a text file named description.txt with the localized
project template description inside every .desc folder.
|
